Location Finder and GSM Mapper

- Details
- Category: Android Apps
- Published on Saturday, 21 June 2014 16:50
- Written by Administrator
- Hits: 16013
1. Motivation. Well, the idea was to come up with an application which could give me my location with the following riders. One cant access GPS, Internet connectivity is not available throughout and the battery power is limited. Therefore, one needs to use GSM BTS signals to find out ones location. But as you know, this requires a continuous Internet connection , as is done by Google when we use its network location feature. However, this is quite a drain on the battery. So I thought , why not have a local copy of the location coordinates for the relevant BTSs in your phone SD card. And then, use triangulation and get the approximate location as google does. Further, why not just cache the maps and have a local store and use that instead of downloading maps at runtime. This would save on data usage and battery life. In the endeavour to accomplish the above I have made a humble beginning and have come out with an app called Location finder and GSM Mapper . I have published it on the google android play store for free. Its not done yet , however, feel free to download and share your experiences.
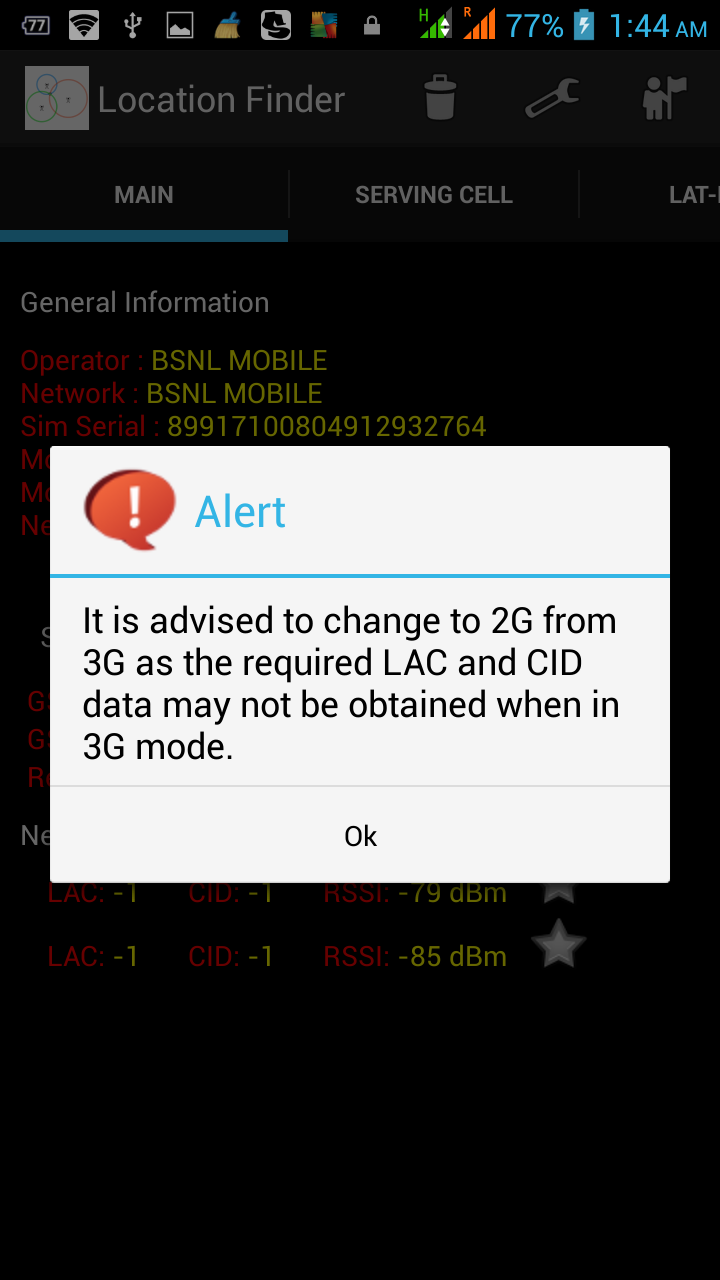
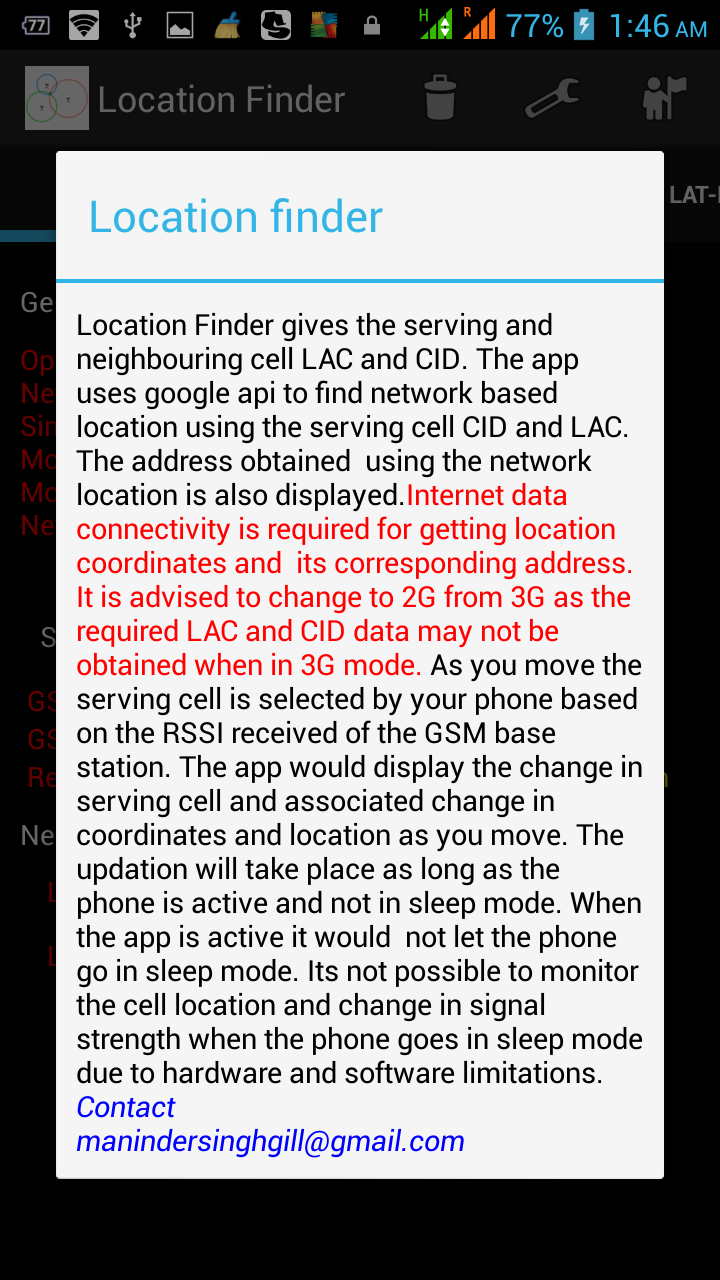
Now coming to the app proper, it consists of the certain fragments which are explained below. This is followed by some usage scenario in which this app can be used effectively. Note that, it is advised to change to 2G from 3G as the required LAC and CID data may not be obtained when in 3G mode. On startup you would get an alert as shown below regarding the same.
2. Main
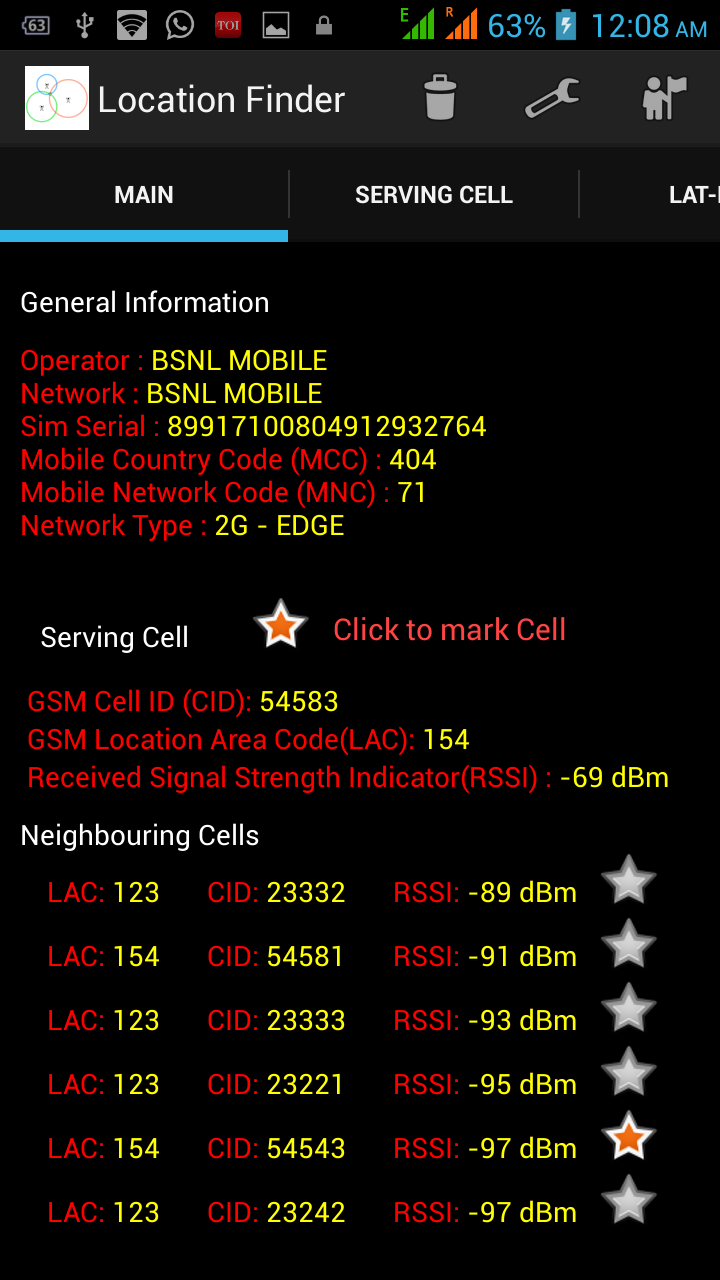
The main fragment displays the operator details such as Mobile Country Code and Mobile Network Code . It would also tell you whether your present connection is 2G or 3G and further details such as GPRS/EDGE/HSPA etc.
The main fragments makes use of an app service which monitors basically two things. Firstly, any change in cell location and Secondly, any change in received signal strength.
Now change in cell location indicates a handoff, Cellular networks are composed of cells, each of which is capable of providing telecommunications services to subscribers roaming within them. Each cell can only serve up to a certain area and number of subscribers. Thus, when any of these two limits is reached, a handoff ensues.
For instance, if a subscriber moves out of the coverage area of a particular cell while entering another, a handoff takes place between the two cells. The cell that served the call prior to the handoff is relieved of its duties, which are then transferred to the second cell. A handoff may also be triggered when the number of subscribers using a particular cell has already reached the cell’s maximum limit (capacity).
Such a handoff is possible because the reach of the cell sites serving these cells can sometimes overlap. Thus, if a subscriber is within an overlapping area, the network may opt to transfer one subscriber's call to the cell involved in the overlap.
Sometimes a handoff can take place even if no limit is breached. For example, suppose that a subscriber initially inside the jurisdiction of a large cell (served by an umbrella-type cell site) enters the jurisdiction of a smaller cell (one served by a micro cell). The subscriber can be handed off to the smaller cell in order to free up capacity on the larger one.
When a new BTS is encountered on a handoff , its location is queried from google database and is stored in a local sqlite database residing in the phone's SD card. So as you go on using this app , that database is continuously getting updated, and the end state would be, that you would have the details for all the BTSs in your area of operation, something which opencellid project intends doing for the BTS of all the service providers world over and with database residing on the Internet. This app does something similar, the difference being , we are concentrating only on the service provider whose SIM we are using and the database is residing locally and being populated as we use the app. However, I do plan to integrate this app with opencellid project in future.
Coming back to the main fragment, the serving and neighbouring BTSs details such as Cell-ID, Location Area Code and Received Signal Strength(RSSI) are displayed. In case of 3G for neighbouring Cells the LAC and CID values are displayed as -1. This limitation is due to the 3G BTSs. This remains an open issue to be addressed.
From the above data regarding active and neighbouring Cells one can infer as to how many BTSs have been placed by your service provider in a given area. Further , the RSSI indicates how good the reception would be in that area. This has a direct bearing on the Data speed when using GPRS/EDGE/HSPA.
Using the star icon one can mark the BTS. An address can be associated with the BTS. To check the marked location go to the tab Marker Locations.
3. Menu Options

The menu option consists of the following submenu as elaborated below.
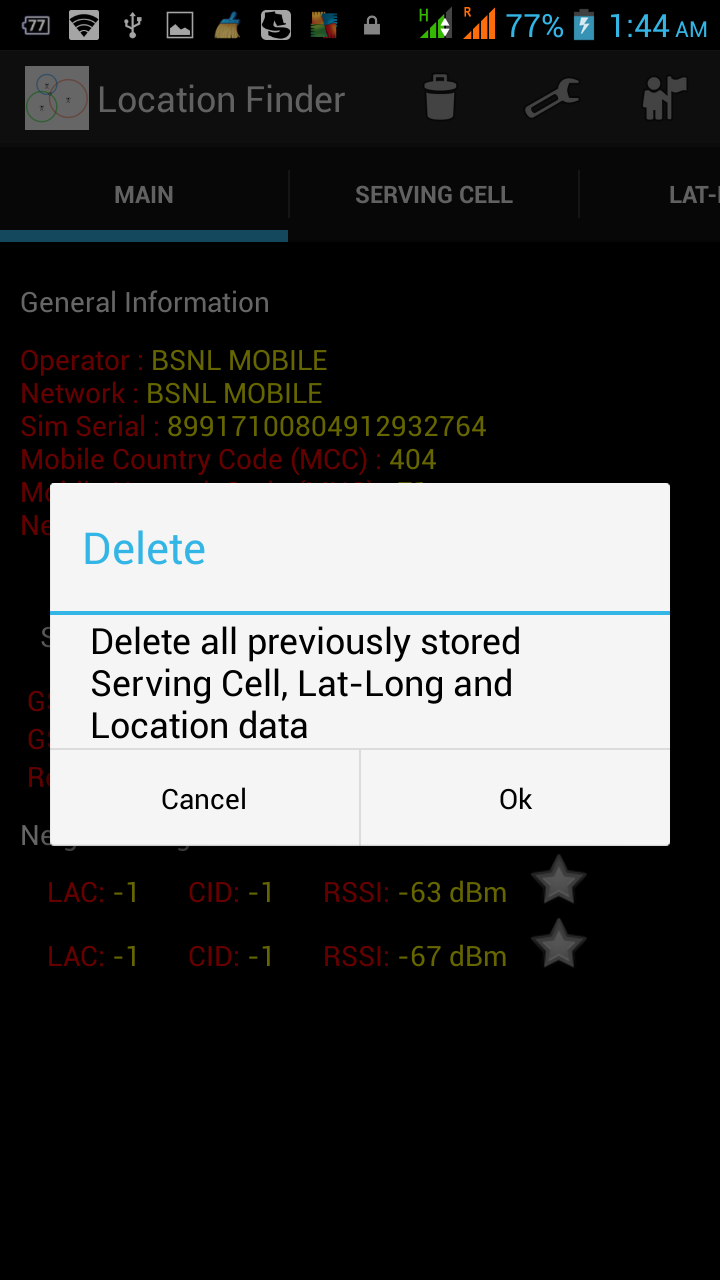
3.a Delete We keep a record of all the previous Cell ID, their location coordinates and corresponding address.These records can be deleted using this submenu.It is recommended to clear the history often as a large history takes time to render when changing fragments.
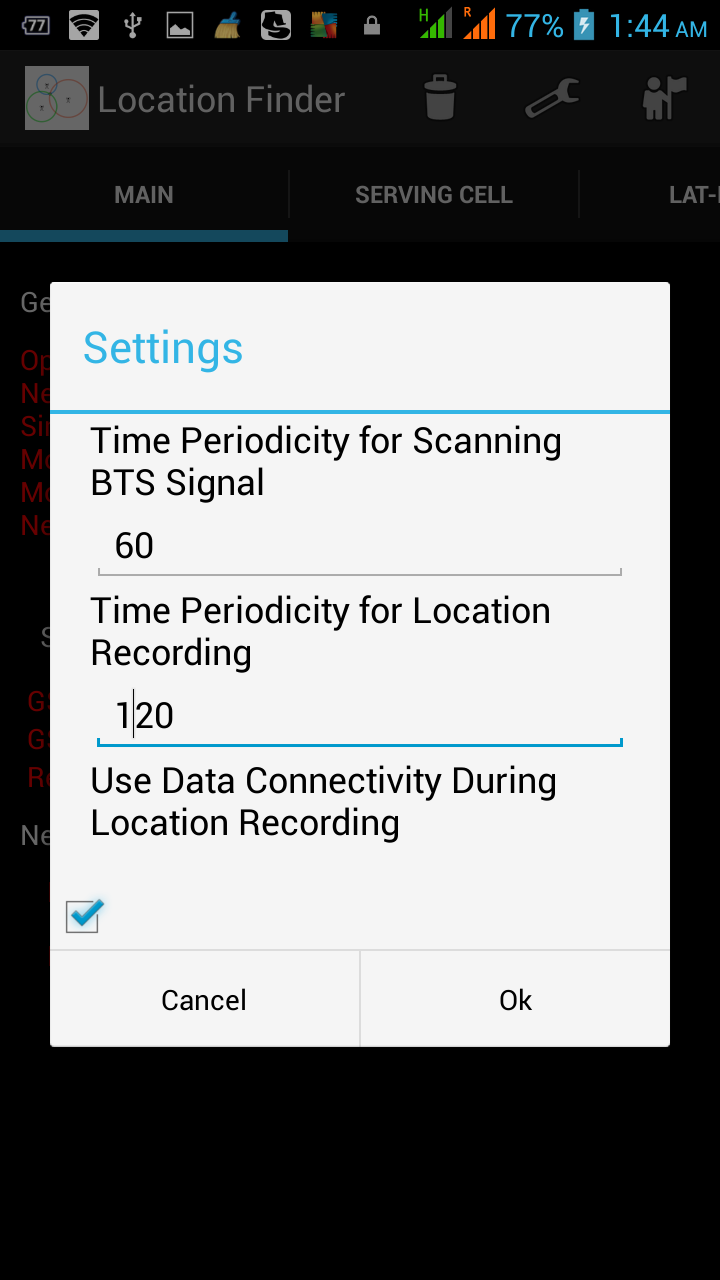
3.b Settings Using this submenu one can select the time interval for scanning the air for the required BTS signals when BTS scanning is enabled. You can also select the time interval for recording the location based on active BTS. Lastly, to save on data usage , one can opt for recording only the Cell-ids when in recording mode. The location resolution will be done when rendering the route fragment thereby saving on precious battery life and cellular data usage.
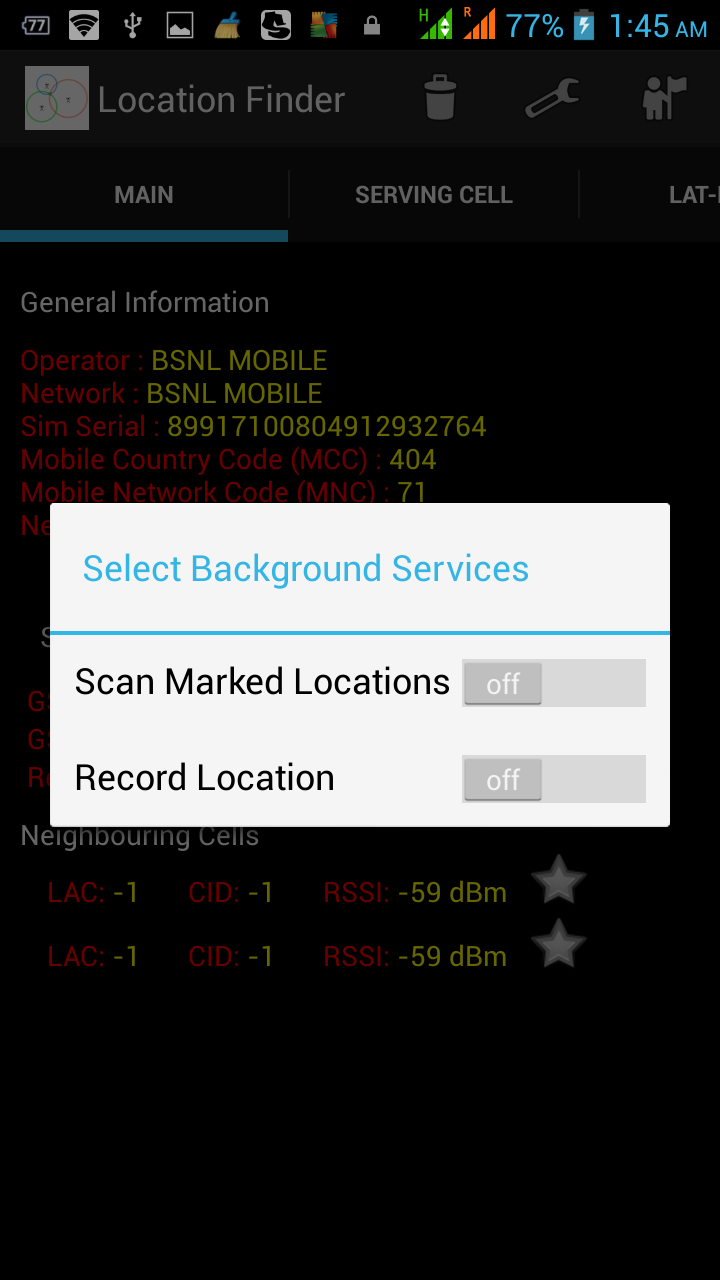
3.c Services Using this option one can start the background scanner for BTS signals or start a background service to record location based on active cell. Note that when you start either of the above services, we need to scan the air for the GSM signals. Now in Android when you phone is in sleep mode, the api when invoked by the user application will not give the required result. The OS has been designed such. Therefore, we need to bring the phone out of the sleep mode temporarily and again put it back to sleep. And in that time duration scan for the air waves.So you would see your phone come out of sleep mode(something which happens when you press the power button) exactly at the desired time interval ( selected in menu option above) and go back back to sleep within a second. Therefore, one can just lock the phone and yet it would alert/record location based on the mode selected.
To provide user a feedback regarding BTS Scanner service running in the background, the app would vibrate for a very small duration at a periodic interval which is 1/10 of the BTS scanning time interval. So if you set Time periodicity for scanning BTS signals as 120 sec than the app would give a very short vibration every 12 sec to indicate the app is running.
3.d About
3.e Database To understand this we need to have a look at the database and the tables being maintained by this app. This app would create a directory LocationFinder in your SD card. In that folder there are two sqlitedb files which are created i.e LocationFinder_BTS_DB and LocationFinder_Time_BTS_DB. Using any sqlitedb browser such as SQLite Manager available for free on Google Android Play Store one can see that LocationFinder_BTS_DB.sqlitedb contains two tables ie bts_data and location_data. bts_data contains the details for all the BTS which your phone has ever come in contact with when the app was running in foreground or background.location_data contains the details of the location which have been marked by you. LocationFinder_Time_BTS_DB contains the table timed_bts_data. This tables contains the cell-id and LAC and corresponding location of active cells which are recorded when in recording mode.
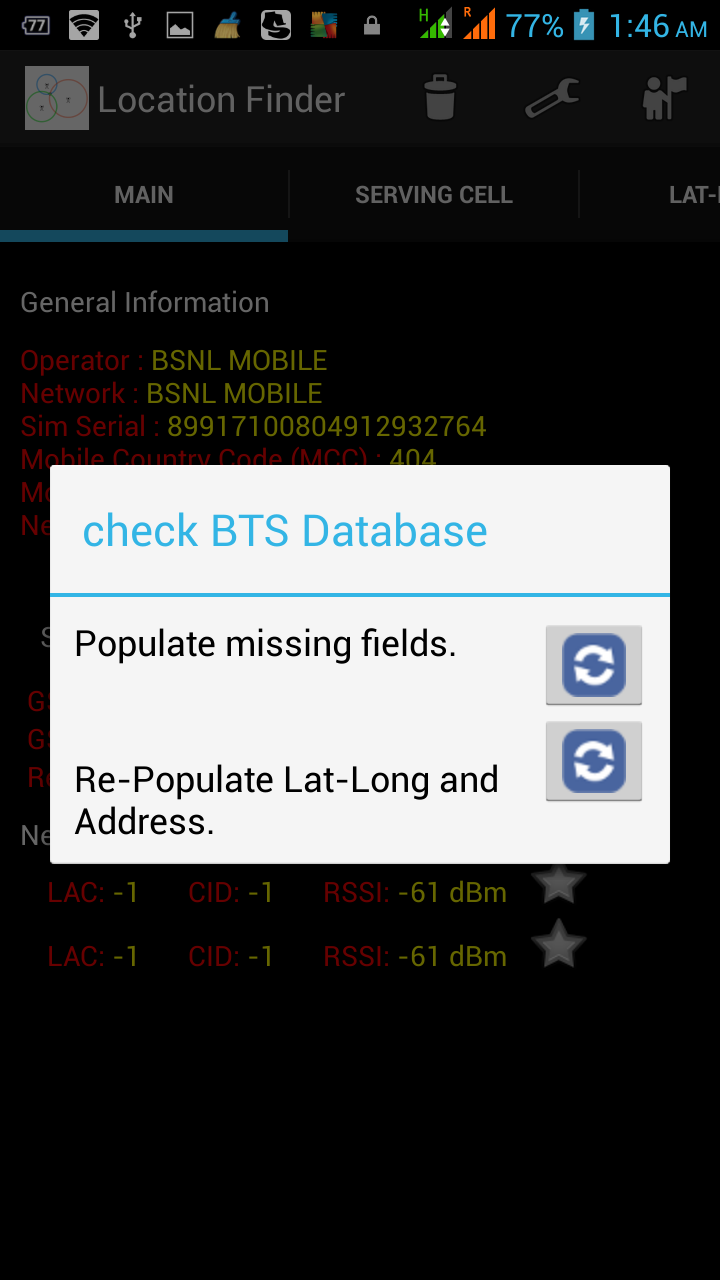
Now a situation may arise that when using the app that you don't have access to Internet. In that case the app just records the Cell-id and LAC value for the BTS. The corresponding values of location and address for the BTS can be fetched later from Google database using the first option ie Populate missing fields.

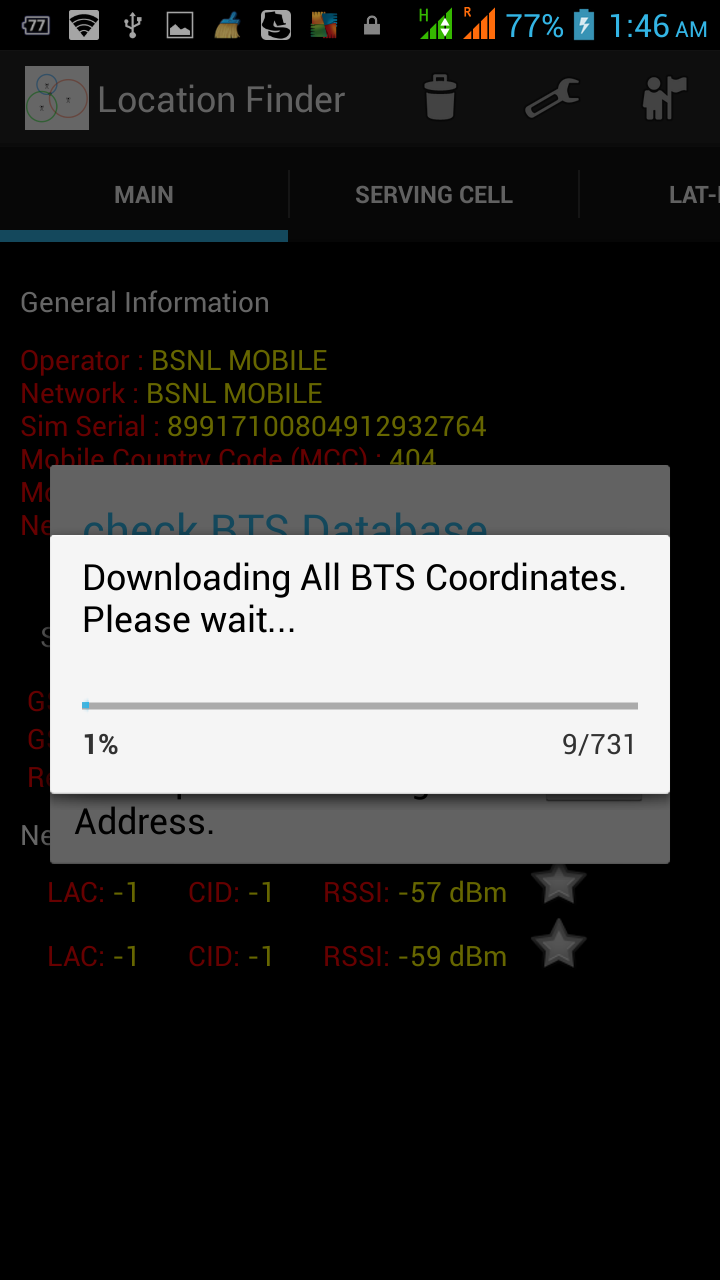
We are using google database for ascertaining the location and address of a BTS which is not so accurate.Google is constantly improving its database based on the inputs received when users use GPS data alongside google maps. So the second option i.e Re-populate Lat-Long and address has been given to refresh your local sqlite database using the latest Database existing on google.
3.f Exit This is to shut down the app completely. All background services will be stopped.
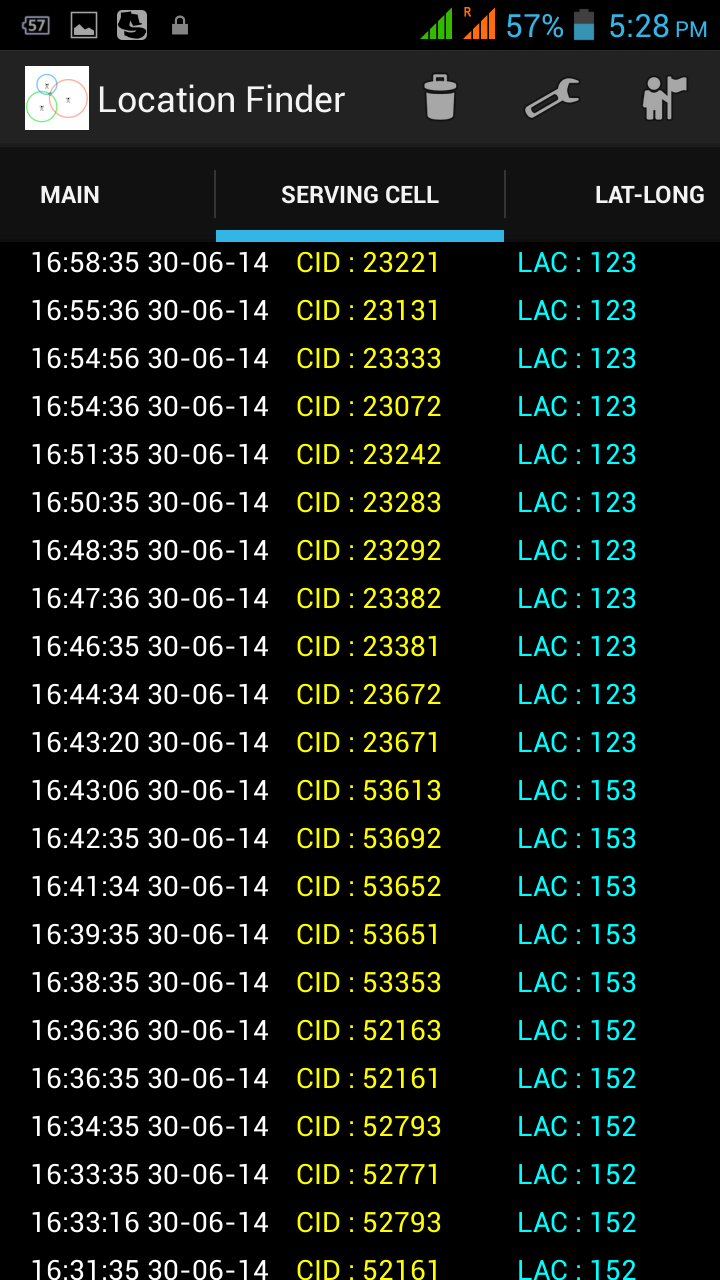
4. Serving Cell
This fragment displays the details (ie CID and LAC) of the active cells to which the phone had been connected. As your phone does a handoff , the new BTS details are logged here. So by viewing these details one gets an idea how often your phone does a hand-off.
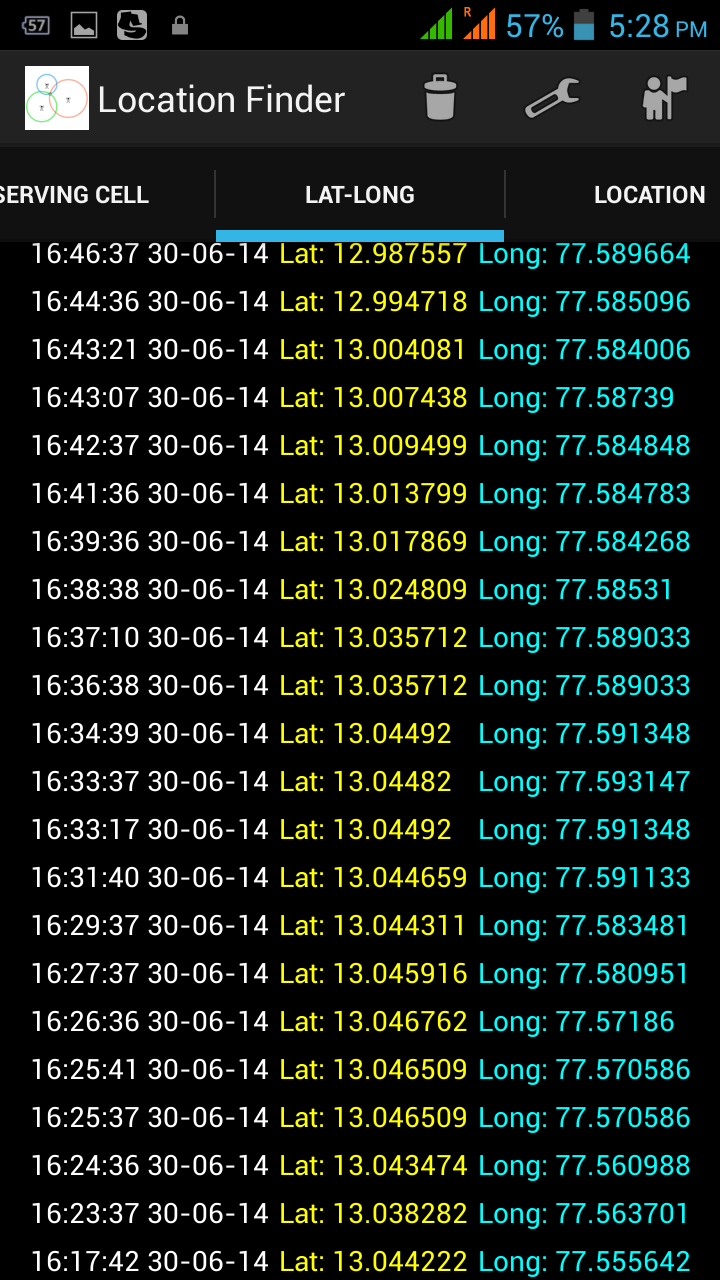
5. Lat-Long
This fragment displays the location of the active cells to which the phone had been connected. As your phone does a handoff , the new BTS location is querried from google using the cid and lac of the BTS and the same is logged here. So by viewing these details one gets an idea how you are traversing the globe. Although these details have been obtained from Google, however, they are not so accurate.
6. Location
The lat-long values may not make much sense to you , therefore this feature has been added where one gets to know the approx address from the location coordinates. This api has been provided by google and is not that accurate.

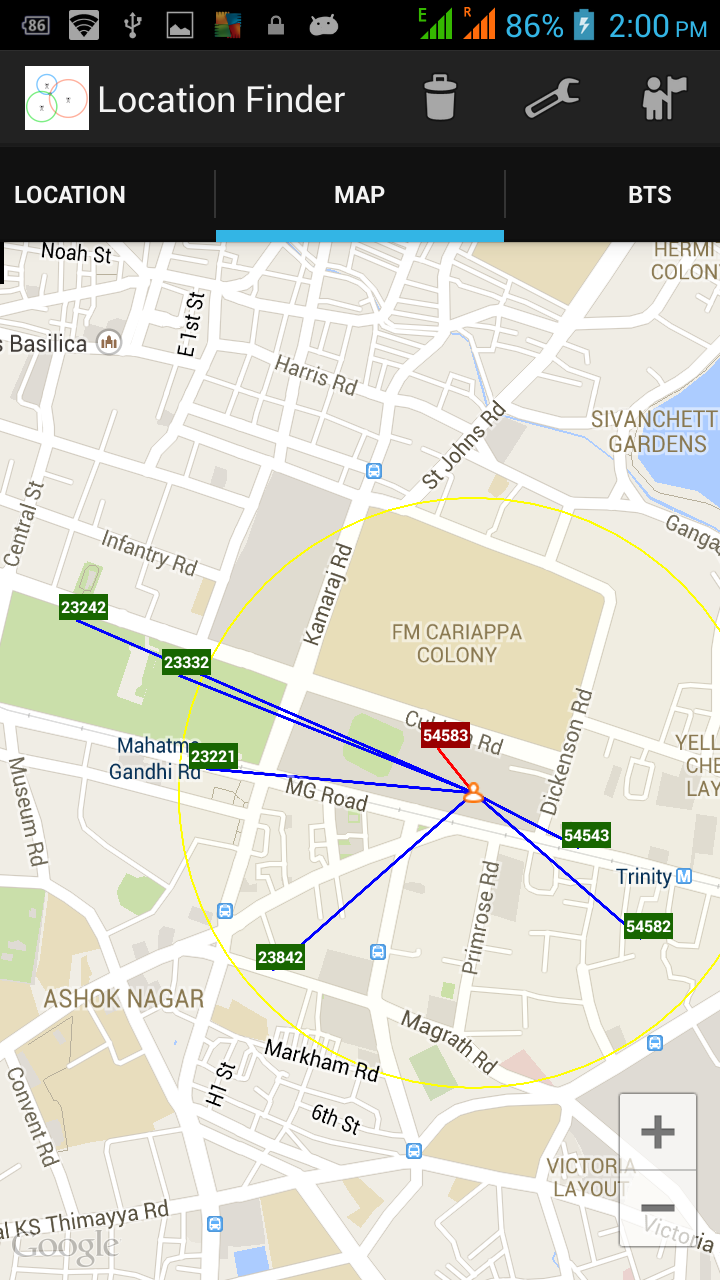
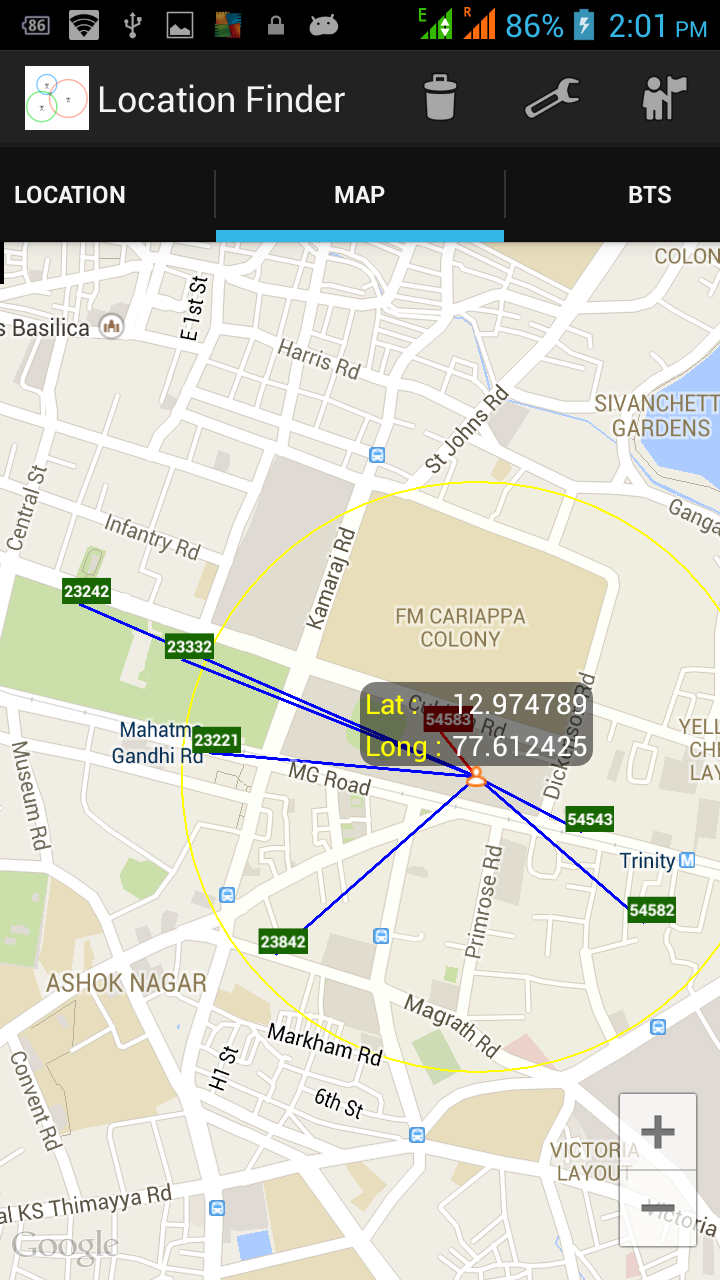
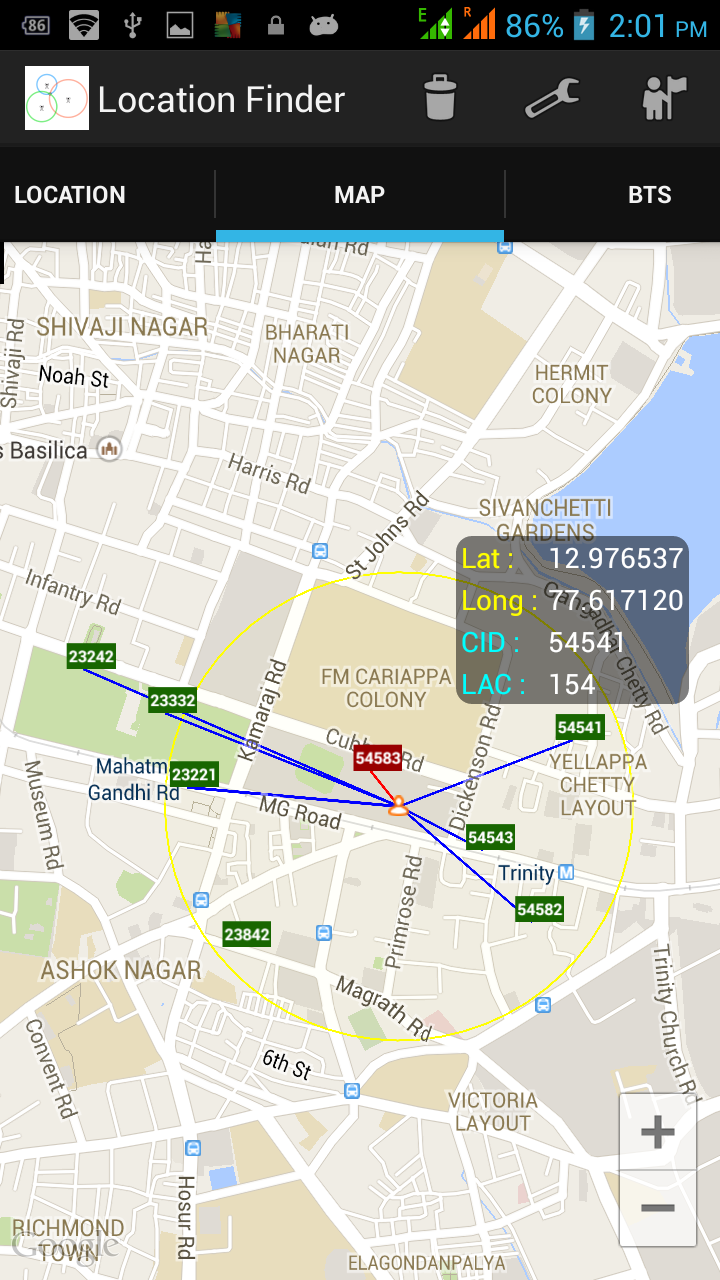
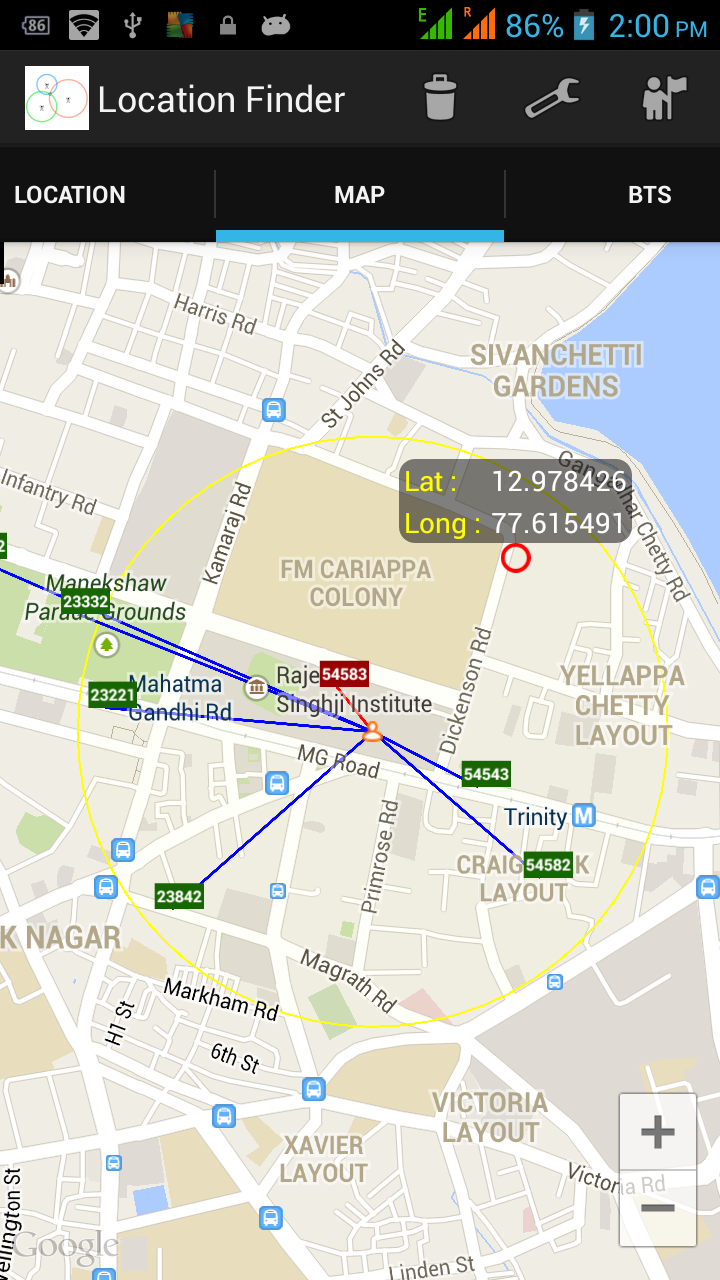
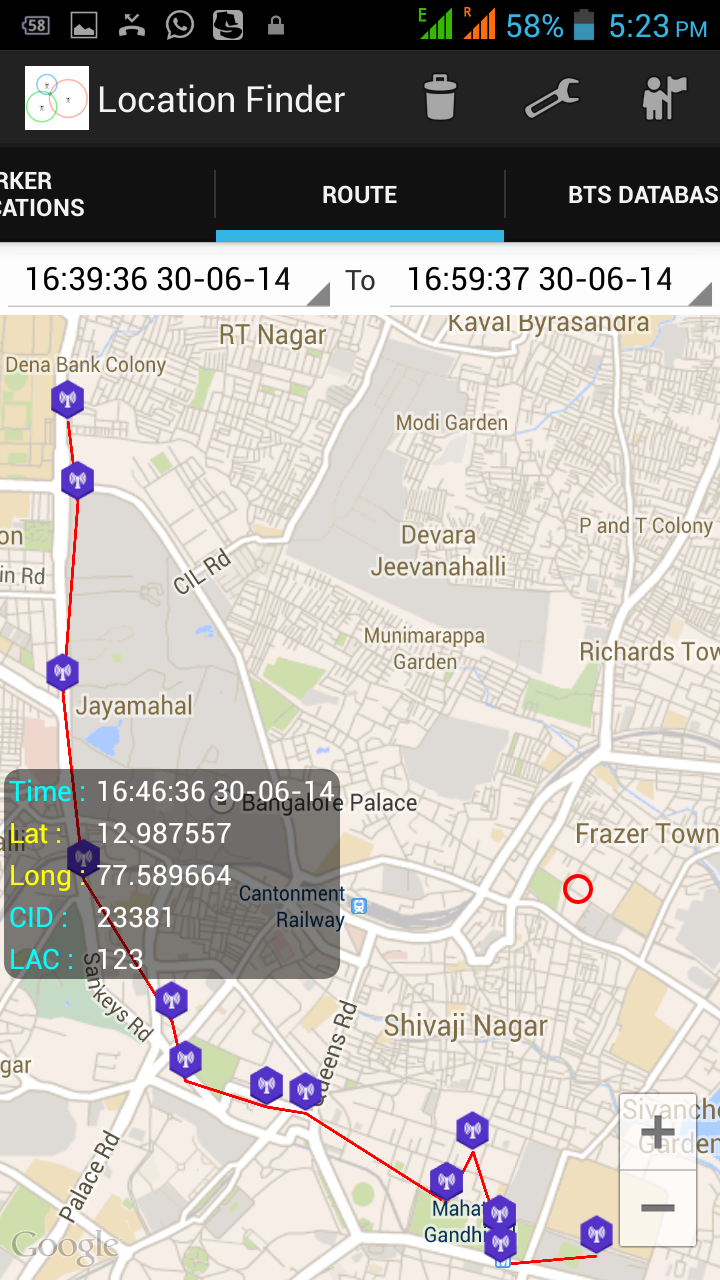
7. Map Own location is depicted by  . The active cell is displayed by a text box having red background and connected to present location using a red line. Neighbouring Cells is displayed using a text box having a green background and connected to present location by a blue line. Those cells which are not connected to present location but are being displayed with either a green background on the google map are the ones which were either active/neighbouring cells in the past. On long pressing anywhere on the map, the area would be marked using a circle with red circumference and it location would be displayed as a popup . On clicking any active/neighbouring cell its details are displayed which include its latitude,longitude,CID and LAC. On clicking the popup an address window would appear and the BTS would be marked with the address entered. As one moves, the handoffs can be seen in this fragment.
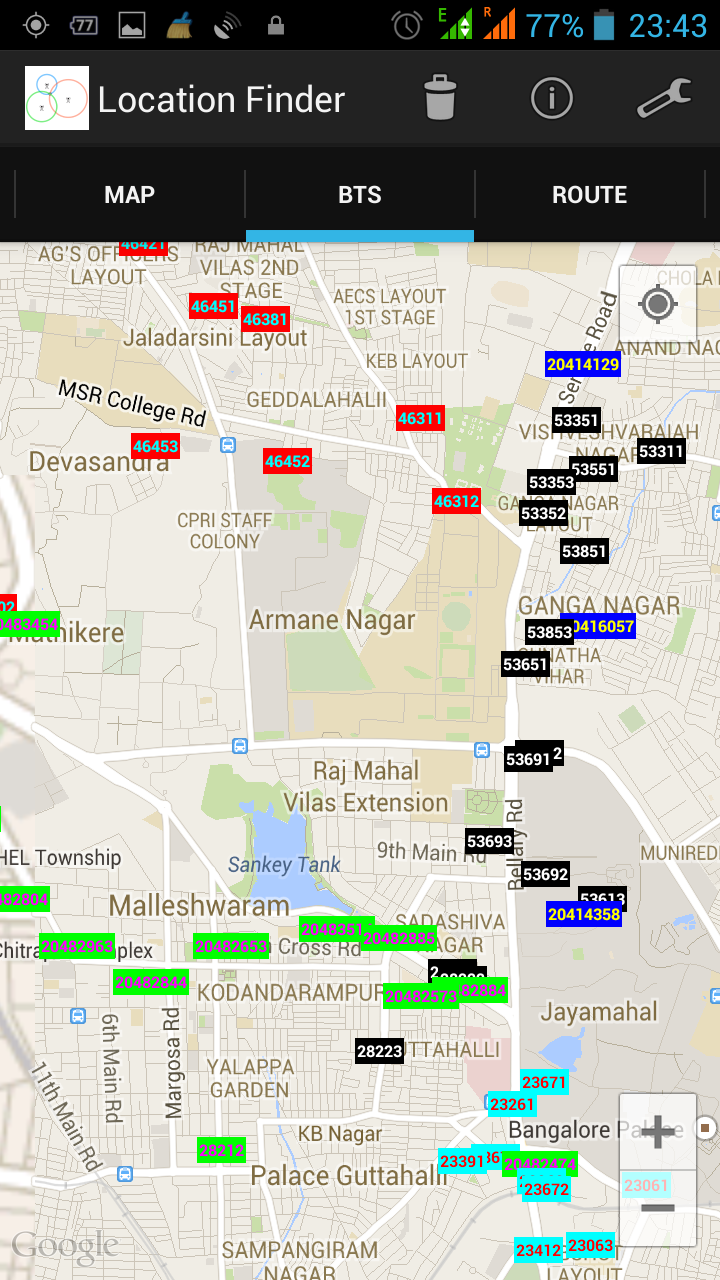
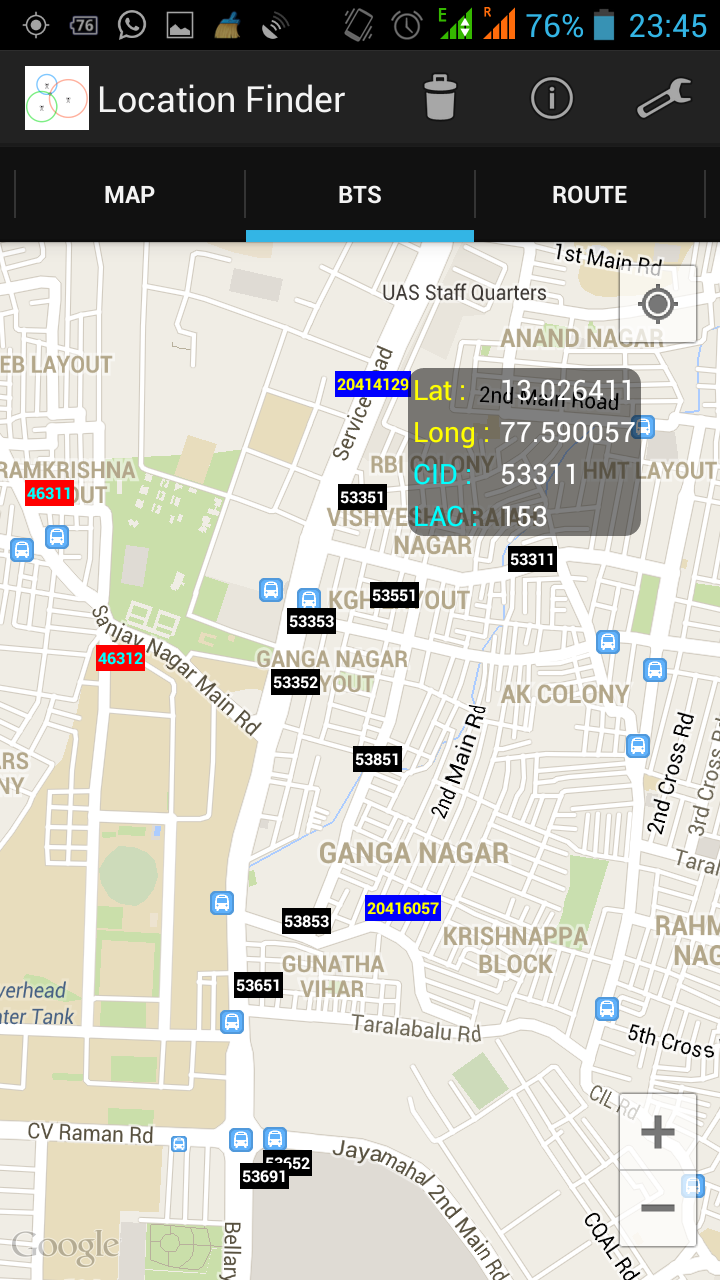
8. BTS
This fragments displays all the BTS whose location coordinates are available in the local sqlite database. All BTS have been coloured coded according to their CID value. Therefor two BTS having the same CID but different LAC are displayed using the same background colour.This fragment can be used to mark a BTS by clicking the popup which in turn appears when you click the BTS marker.
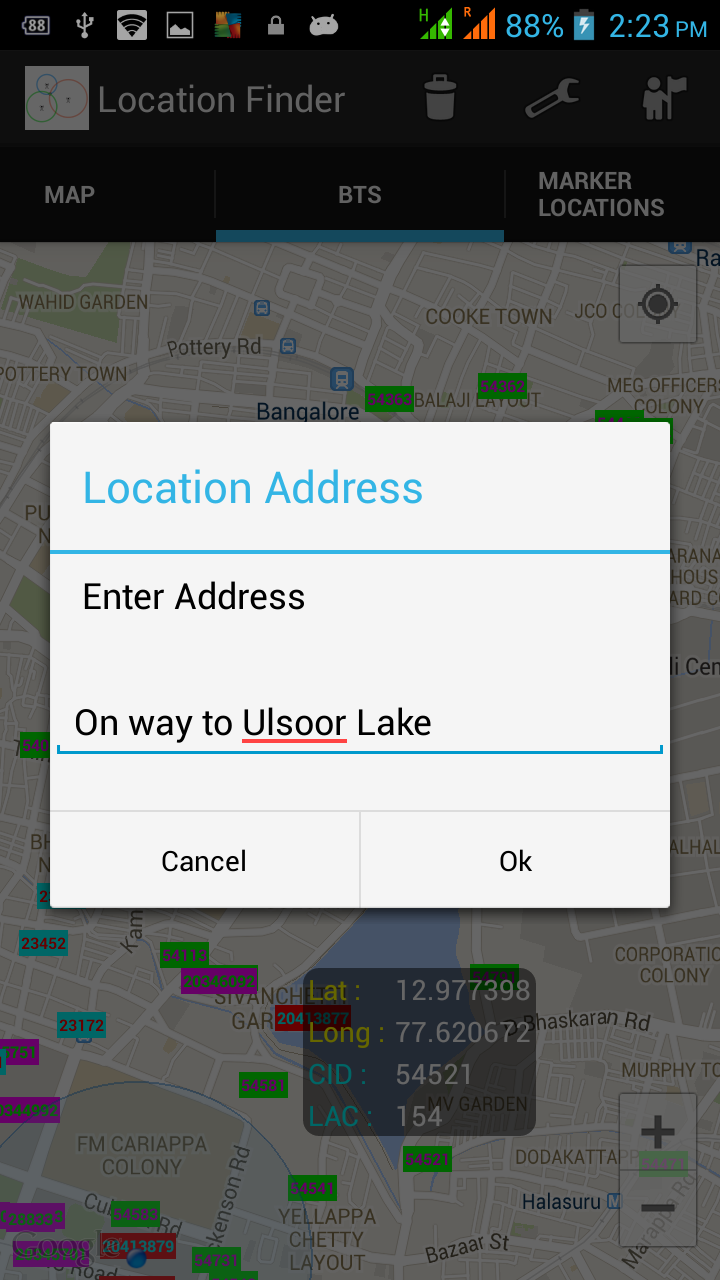
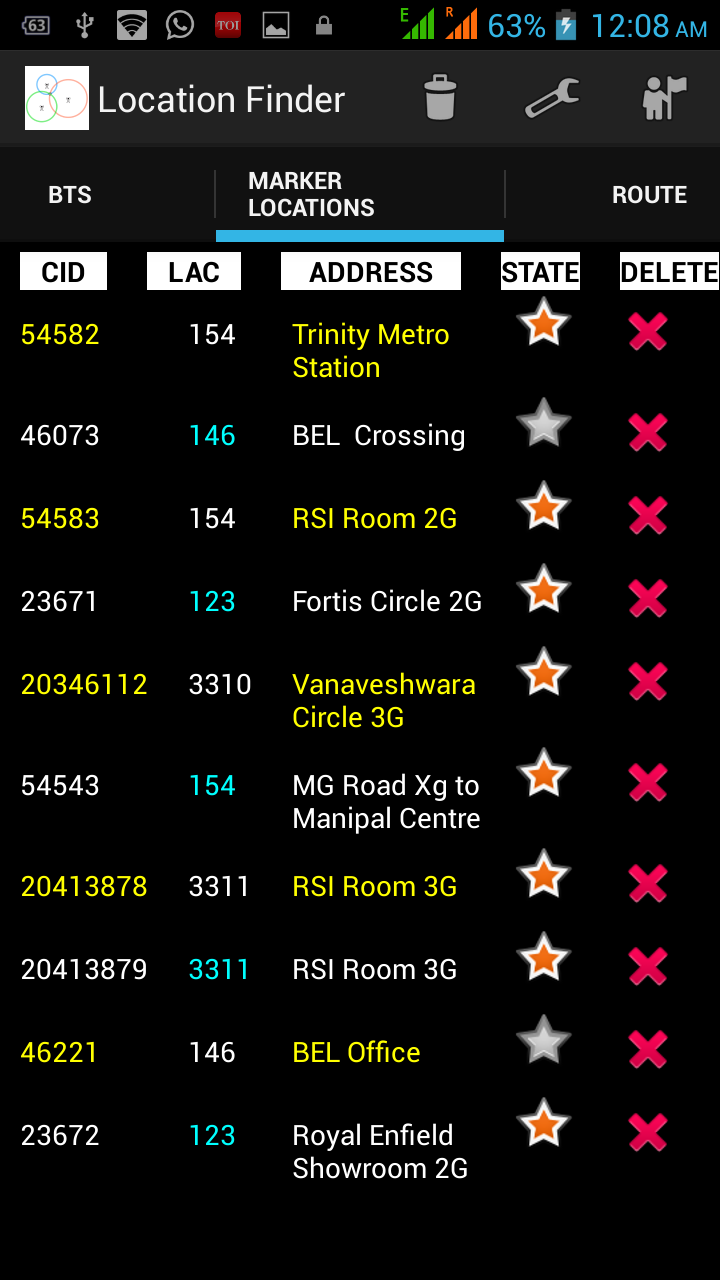
9. Marker Locations
To explain the functionality being offered by this tab , have a look at the screen shots of the Marker Location ,Main and BTS tab. The location marker is denoted by a star. The star has two states, the orange filled state indicates on and the inside blank is off. Incase a marker location for a BTS is on , this implies that, moment the app finds that particular BTS is either the active Cell or is one of the neighbouring Cell, an alarm would be sounded. The list of all markers , whether in on/off state is shown in the Marker Location Tab. To mark a BTS, either use the Main tab by clicking the Star icon or click the info window which appears when you click the BTS location text in BTS tab. On clicking ,you would be required to enter the address for the marker which is displayed against it in the Marker Location Tab. To toggle the state of a marker i.e activate/deactivate a particular marker click the star icon To delete a marker click the cross icon.

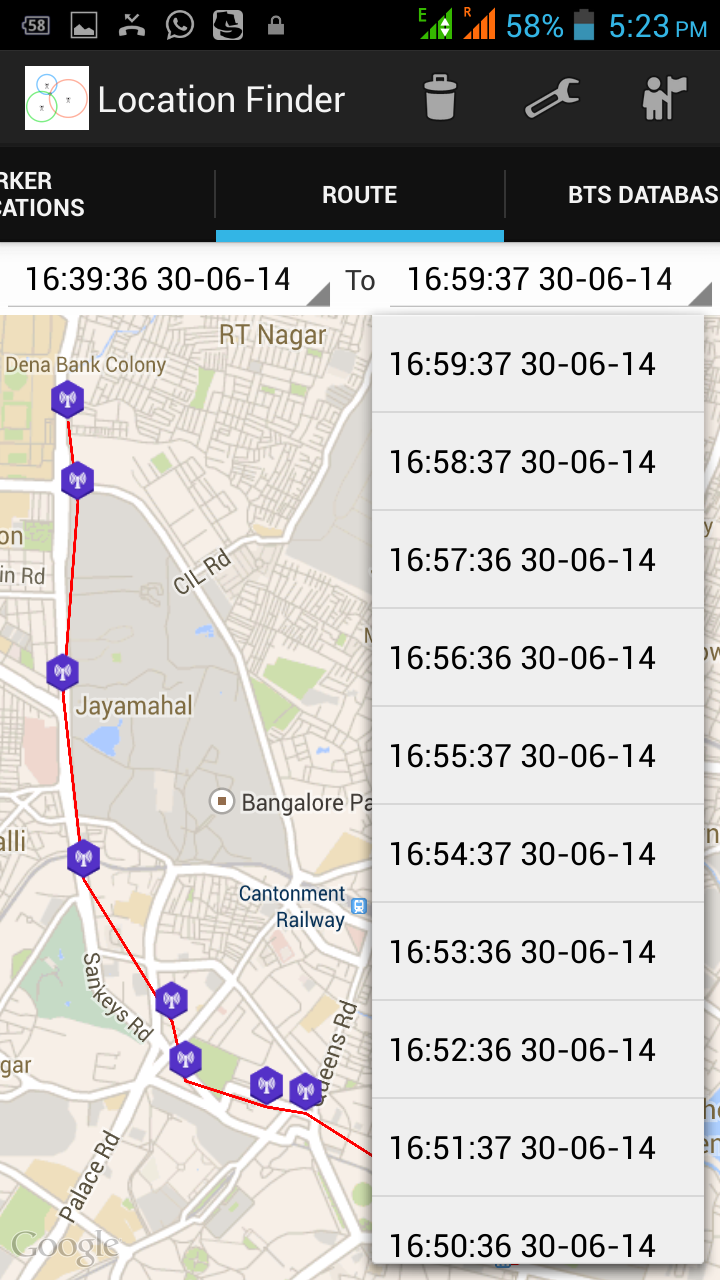
10 Route
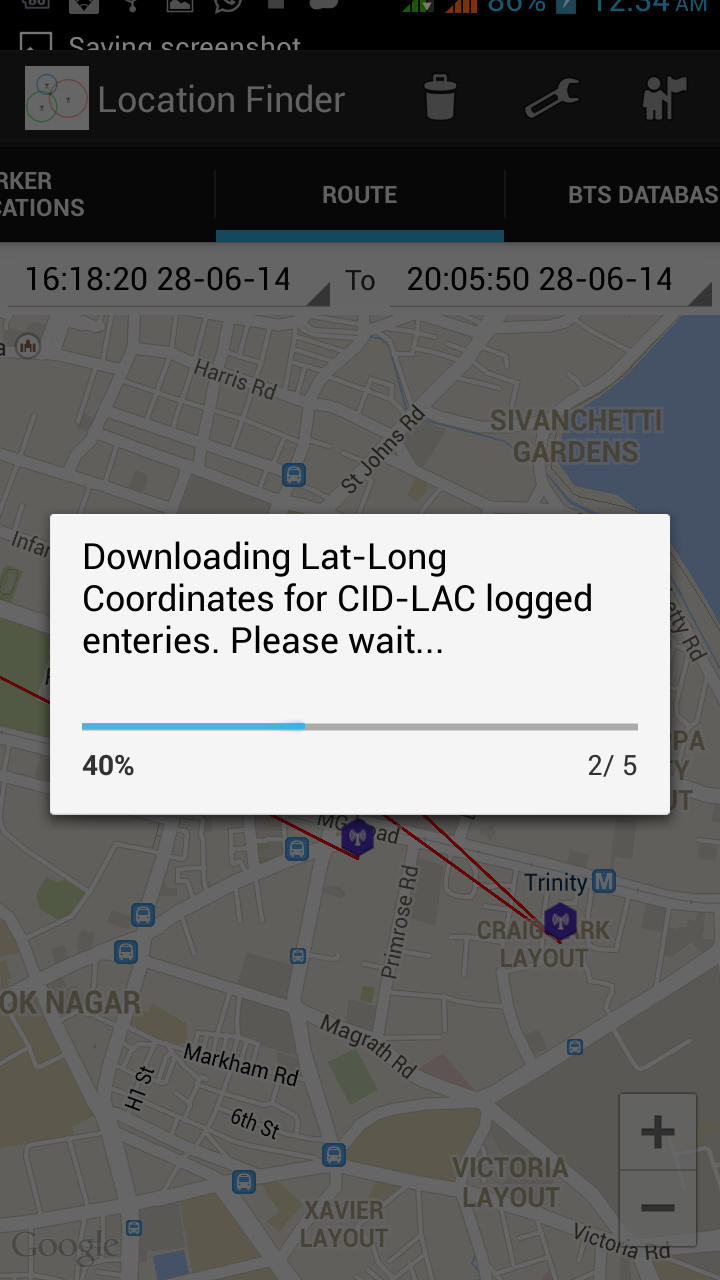
The idea here is to record the approximate location of your phone over a period of time using minimal amount of battery life .So we are making an approximation and taking the location of active BTS as your location. This location is recorded at regular time intervals, the time interval can be set by going to the preferences in the menu option. Further, one may not want to use the data connection while recording the location to save on battery/data usage. To avail this option, disable use of data connection during recording by going to the preferences in the menu option. However, to display the route taken one needs to get the lat-long corresponding to the CID-LAC values of the recorded cells. For this , when you select the route tab, that is the time when the app using your data connection would find the location coordinates for the recorded cells in the sqlite database.

11. BTS Database
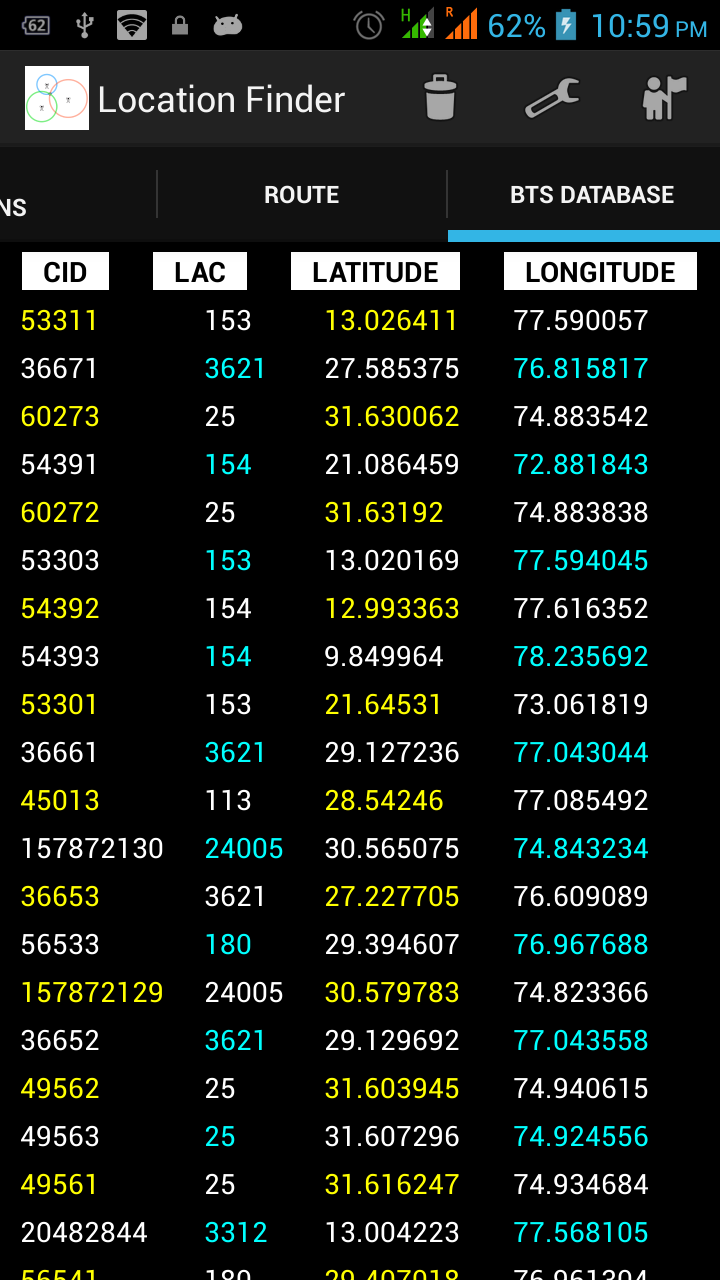
As your cell moves through the coverage area of various BTSs, an active cell is selected based on the received signal strength. The latitude and longitude of those active BTS is found out using the google database. For this we use the CID and LAC of the BTS and using the active data connection, we query the google database. The result, which comprises of Latitude and Longitude of the BTS is saved in our local sqlite database. Therefore, any subsequent query for location of a BTS can be handled locally and does not require an active data connection.
Known issues: The google data base is not complete and correct.When I say not complete, is that for all BTSs , google does not have location coordinates. I plan to give user an option to switch on his GPS and capture the missing data and use that as the location coordinates for those active BTS. Users can suggest any other options in the comments section below. When I say not correct, I mean for certain CID and LAC values the Latitude and Longitude values returned by google are not correct. For example, for a BSNL(GSM Service provider in India) BTS having a CID 28591 and LAC 128 located in Bangalore,Karnataka,India the location coordinates given by Google are for Gandhinagar,Gujarat,India. This is more clear when you see the BTSs from your local sqlite database plotted on a map in the BTS fragment. I am working on it. I am planning to have a option using which one can blacklist such records in the local sqlite database. Users can suggest any other options in the comments section below.
12. Some Usage Scenarios
Take for example a scenario where you have boarded a train to go from station A to station B and return back the same way. Now while returning back to Station A from station B how do you find out that the train is approaching the desired station ie station A. As you are indoors GPS would not work, further Google network location service requires you to have data connection, which may not work inside the train that well, due to electromagnetic shielding and further it is not accurate. Therefore to check whether your desired de-training station has come, one would have to see out of the window and ascertain the same from the surroundings. However, with this app one can mark the desired stations Active/Neighbouring Cells while at station A and start the BTS Scanner when starting from station B. As a result, moment you approach station A the BTS scanner would pickup the signals from one of the marked BTS and would trigger the Alarm , indicating to you that you desired station is approaching. Similarly this app could be useful when travelling by bus. The other related advantage of this approach is minimal battery drain as you are not using either data or GPS and only relying on the BTS signals which as it is your phone is tracking in the background.
13. Why and How to Activate Device Administrator ? On installing the app you would be asked to activate Device Administrator as shown below. This is required as we want to have the functionality to lock the phone screen to put the phone immediately into the sleep mode in order to save battery life. This screen will only be shown to you at startup.
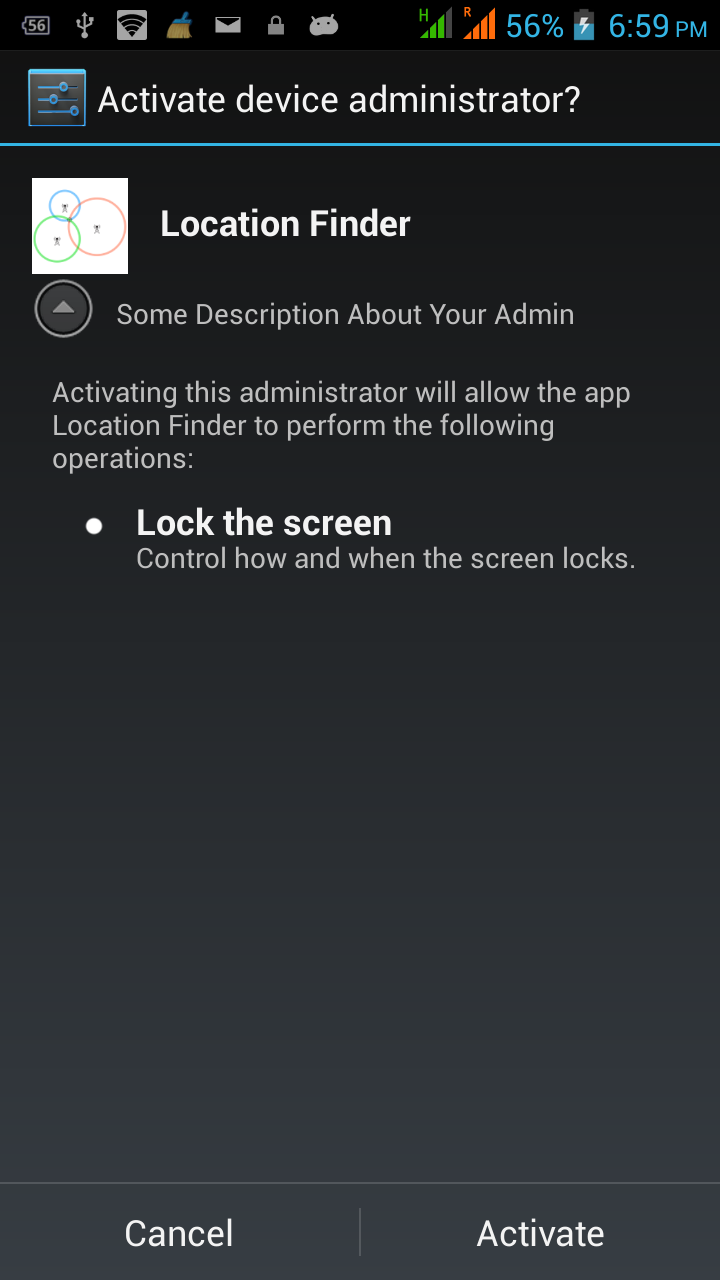
Note that when you want to uninstall the app you would have to deactivate the app from the list of Device Administrator.
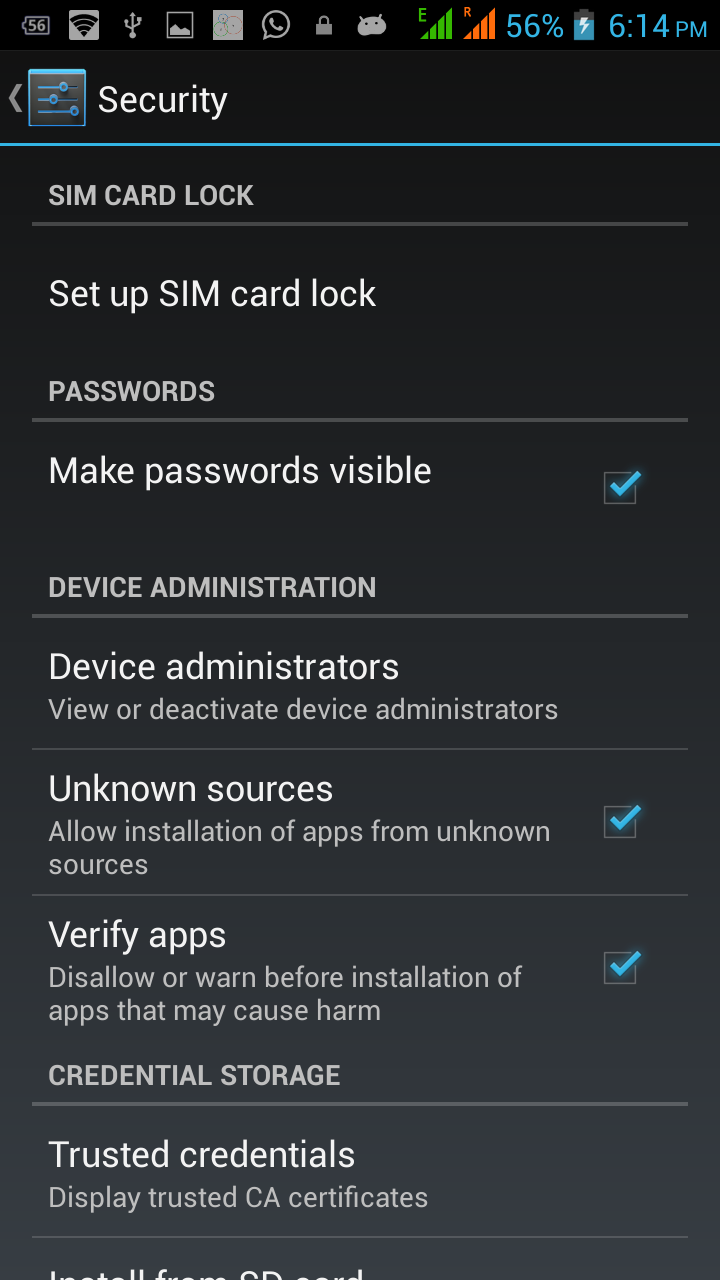
Incase you press cancel on the above screen , the app would not be able to lock the screen and would not function properly. However, you can activate/deactivate Device Administrator feature for the app by going to the Settings -> Security - > Device administrators as shown below.


14. Known Issues with the App
On changing 2G to 3G or vice versa sometimes the app tends to malfunction. It is recommended to follow this sequence, firstly, exit the app , switch data connection and thereafter start the app. This restriction would be fixed in subsequent release.
Finally , my sincere endeavor is to provide a free and user-friendly app , evolving with each passing day based on the feedback from users , feel free even to rate it as 1 star , provided you state a reason for the same. And I am conscious of the fact that in certain area the Internet connectivity is not all that good, so there would be never be any ads on this app which eat up Internet bandwidth.